INFORMATION FOR ACRYLIC LETTERS
Acrylic Plastic Letters, Numbers and Logos
Acrylic cut letters are the low cost, all weather workhorse of sign lettering. Acrylic, also known as "Plex" comes in many pigmented colors which because of their super glossy appearance can look too much like plastic. Acrylic letters and numbers are excellent for painting with acrylic polyurethane which eliminates the plastic look and also allows for different paint sheens like semi gloss, satin and matte.
Depending on letter or number size, cut acrylic lettering can get expensive, especially as the thickness is increased. For this reason we only recommend using large acrylic letters up to 36" tall since beyond that there are more suitable products available such as vacuum formed plastic letters that are molded and provide greater depth while keeping the price affordable. Acrylic letters are suitable for any environment whether it be the arid South Western States, the humid South Eastern States or the Northern States where temperatures can drop to sub zero. For indoor applications they provide a crisp look and can be painted in any of thousands of colors from Pantone to Sherwin Williams to Benjamine Moore color schemes.
When used outside, occasional maintenance is always a good idea. Once a year, check all the mounting hardware to make sure it is firmly attached to the building. Make repairs as necessary and should you need to replace a failed letter, just send us an email with a picture of the failure, your name and address and your original order number and we will have the factory make a new one and ship it to you at no charge. Cleaning the letters should also be done as needed. A simple soapy water solution is all that is required to bring your letters, numbers and logos back to their original sparkling condition.


Mounting Hardware

PLAIN MOUNT
The no-mount option is for when you want to glue letters directly to a flat surface using some kind of adhesive such as silicon caulk or liquid nails. The problem with this type of installation is that glue tends to squeeze out the edges and it can get very messy. Also, until your glue sets the letters can move around and for large letters that means you need to use long strips of masking tape to hold them in place.

DOUBLEFACE TAPE MOUNT
Double sided tape can only be applied to letters up to 24" in height. If using this option then always use a liquid silicon caulk as well to protect the letters in case the tape should fail
PAD MOUNT
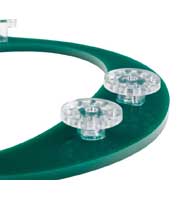
Plastic pad extending beyond back of letter, typical with plastic letters, install product direct to wall without having to drill any holes. Installed with use of a spacing guide. Silicone is a common adhesive to hold such letters.

STUD IN BLOCK MOUNT
This is the default stud mount. This option will have blocks glued to the backs of the letters that create a natural surface standoff of about 3/8" which can be enhanced by choosing a standoff length in the forms options. The blocks are drilled and tapped to accept studs(threaded rods) that get glued into holes drilled in the mounting surface. A drill mounting pattern is required.

COMBO MOUNT
The combo or combination mount differs from the combination all mount in that it only has stud THROUGH pads on the tops of the letters and standard PAD mounts on the bottoms. This mount is useful where you want to drill as few holes as possible and still have mounting rods(studs) in the wall. Installed by drilling holes for the stud through pad and adhering non stud pads directly to mounting surface. A drill mounting pattern is required.

COMBO ALL MOUNT
The combination all mount is stud through pad on all points. This gives you adjustability on every stud and is useful for irregular surfaces such as corrugated metal buildings, lap siding, stone walls or anywhere you want a standoff form the wall that is adjustable during installation. A drill mounting pattern is required

FLUSH STUD MOUNT
Letters have to be at least 3/8" thick to drill and tap the holes but this mount is very secure since it does not rely on a glued block to hold the stud. This mount is best used without wall stand-off which will compromise the purpose of this mount which is to prevent theft. If you want stand-off you can select it also but allow for the stud length which should be 2" in the wall plus the length of the stand-off. Mounting pattern is required. See the section above for mounting to real brick or for more information.
Standard Sheet Colors
Also available your custom Pantone, Sherwin Williams or other color($20 mixing fee per color)


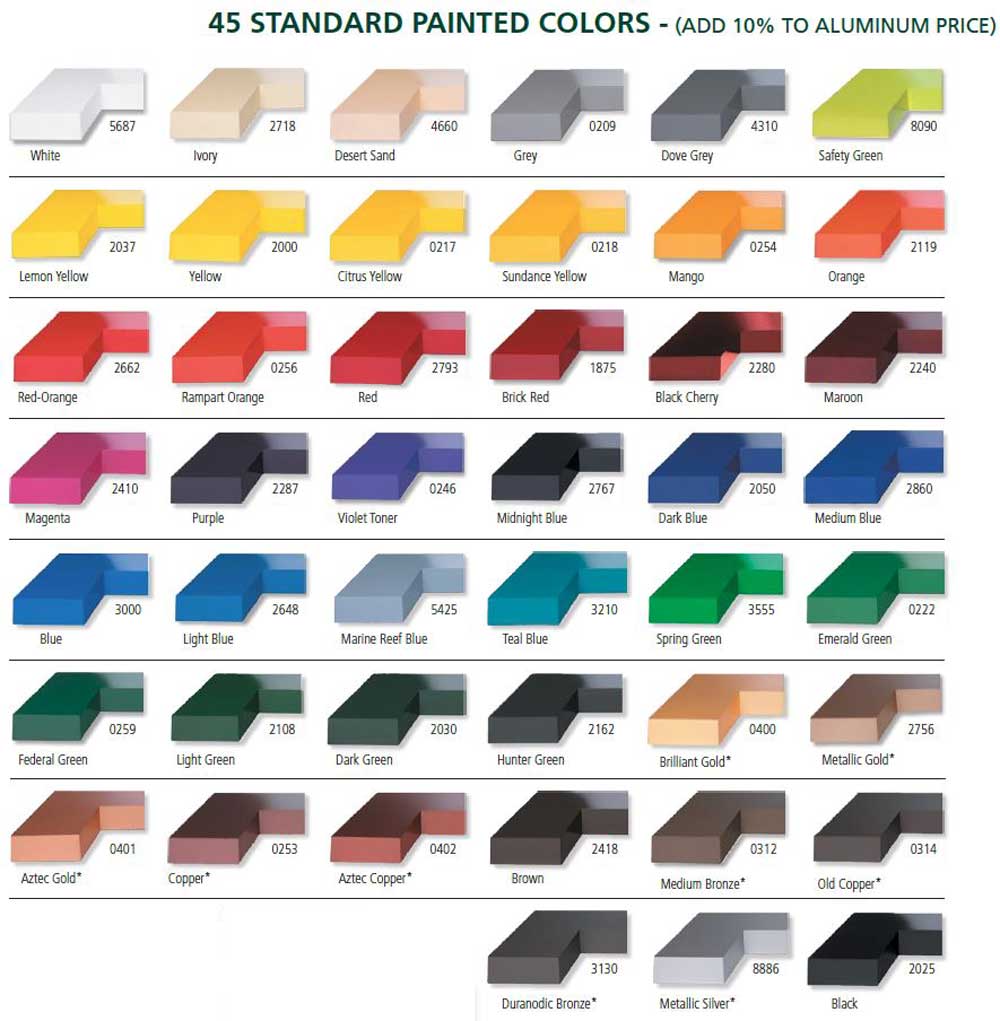
Painted Colors
Also available your custom Pantone, Sherwin Williams or other color($20 mixing fee per color)
Acrylic business sign letters are the least expensive and most versatile letters. Precision laser cut acrylic letters and numbers with sharp, polished edges can be made in an unlimited choice of fonts and custom artwork. Logos can be done as well, you just need to send us your vector artwork and we can reproduce your logo in virtually any size. Colors can also include Pantone matching, Sherwin Williams, and Benjamin Moore. Typically 5 to 7 production days.
ALL OUR LETTERS AND LOGOS CARRY OUR LIFETIME GUARANTEE!
What you need to know about Mounts and Mounting Patterns
The What
Flat cut letters from sheet include Acrylic, Metal Faced Acrylic, Gemleaf, Acrylic on Foam and Metal on Foam. There are several types of mounts available and more than one way to install them but in all cases you will want to have a mounting pattern, especially if the mounts you choose involve drilling for studs. Below are several PDF files you can view and download that deal with both the methods and steps needed to install and the technical views of the various monting hardware available.
We have also included some videos to help you decide which type of hardware to choose that will work for your project.
The Why
Just like any other tool, a mounting installation pattern or stencil guide is a tool that no sign professional would do without. For the average DIY person installing individual cut letters, having a mounting pattern to go by will be like hiring a professional sign installer, for a fraction of the labor cost. At first glance, a mounting pattern looks expensive and many customers forego it to save on costs but it is a false economy which will become apparent when they start to install their sign. Proper spacing and alignment of letters is not something you want to eyeball or guess at when installing a sign at your business. The human eye will easily pick up on any imperfection and if your sign looks bad, so will you.
The How
Before you begin, note that some patterns will have each character numbered. If so, you will find a corresponding number on the back of each metal letter and they MUST go in that position(1 to 1 and 2 to 2 etc), so sort and match first! While you are doing this go ahead and screw the metal threaded rods into each tapped hole. For welded studs (1/8" material only) skip this since they are already welded on and not removable. Now, take your pattern and tape it securely to the mounting surface. Using a heavy metal punch and hammer, mark each stud position through to the mounting surface. This avoids drilling through the pattern which may tear it. When all are marked, remove the pattern and drill holes 2" deep. Now coat each stud and fill each hole with adhesive and push the letter in to the wall. DONE!!!
Mounting patterns with stud locations cannot be made after the letters ship.
TIP: Whenever you are finished installing your letters, keep the install pattern in a safe place in case you ever need to move your sign!


